 Reelsmith
How to Add Subtitles to a Video Automatically (Free, Online)
Generate captions from speech in your browser, edit them, and burn them into your video or export an .srt file — free and without uploading your video.
Captions make your videos easier to follow with the sound off, help viewers who are deaf or hard of hearing, and keep people watching longer. Reelsmith can write them for you from the speech in your video. The speech recognition runs on your own computer, so the audio is never uploaded.
What you need
- A video with clear speech (or a separate voice-over track).
- A recent version of Chrome, Edge, Safari or Firefox. Chrome and Edge are the fastest because they can use your graphics chip.
1. Put the video on the timeline
Open the editor, click New Project (or Start Editing) and drag your video onto the timeline. If the audio is on its own track, that works too — captions are made from everything you can hear.
2. Generate the captions
- Open the Captions tab in the bottom-left panel and click Auto-generate. You can also use Captions ▸ Auto-generate Captions… in the menu bar.
- Choose what to transcribe: the Entire sequence, just the part between your In and Out points, or the selected clips.
- Pick the spoken language, or leave Detect automatically.
- Choose the accuracy. Base is a good balance; Tiny is fastest; Small is the most accurate for difficult audio and less common languages.
- Click Generate.
The first time, the caption engine downloads once (about 45–95 MB, depending on the model) and stays in your browser. After that it starts almost instantly.
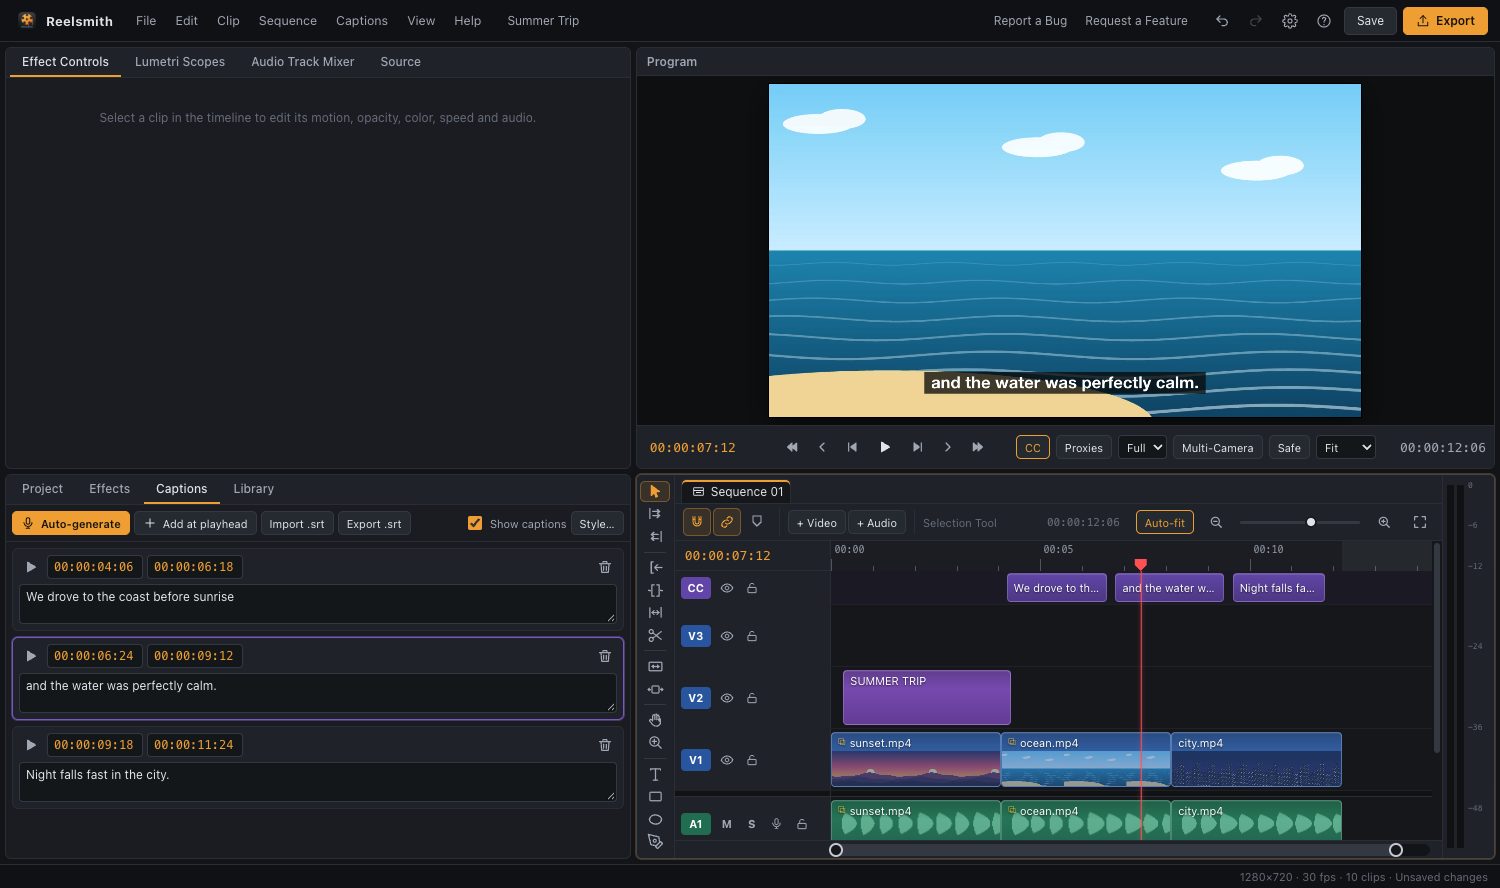
3. Check and fix the words
Speech recognition is good but not perfect — names, brands and technical words often need a correction.
- Click a caption in the Captions panel and edit its text.
- Drag caption clips on the CC track to move them, or drag their edges to change how long they stay on screen.
- Click Add at playhead to add a caption by hand.
4. Style them
Click Style… in the Captions panel to change the text size, colour, background box, position and margin so the subtitles fit your video.
5. Export with captions
Click Export. Under Captions choose:
- Burn into the video — the subtitles become part of the picture (best for Instagram, TikTok and Shorts).
- Save as an .srt file only — upload it as a subtitle track on YouTube or Vimeo, where viewers can turn it on and off.
- Burn in and save an .srt file — both.
You can also use Captions ▸ Export Captions (.srt)… at any time.
Hide captions without deleting them
Untick Show captions in the Captions panel (or click CC in the Program monitor). Hidden captions are left out of exports unless you choose Burn into the video.
Free up the space later
The caption engine stays in your browser for next time. To remove it, choose Captions ▸ Remove Caption Engine… — it downloads again whenever you need it.
Read the full reference in Captions and subtitles.